Sunday is my baking day. I try to keep my day open so that I can have time to play in the kitchen, and soon 5 or 6 hours of experimenting goes by in a flash. I know we’re all tired of talking about the brutal winter weather we’ve had on the East Coast this year, but last Sunday I was so sick of it that I felt the need to create my own sunshine… in the form of this grapefruit tartlet! Ironically, as soon as I started squeezing grapefruits it started to snow and didn’t let up the entire afternoon.
I love my little tartlet pans for making individual desserts. You could easily modify the filling in these to suit your taste, but bright punchy grapefruit was calling to me! I like to cut my grapefruit and lemon curds with a little bit of orange juice — it tempers the tartness, allowing for less sugar in the mix. You won’t be able to tell the orange is there, but if you prefer a seriously puckery curd, you can leave it out.
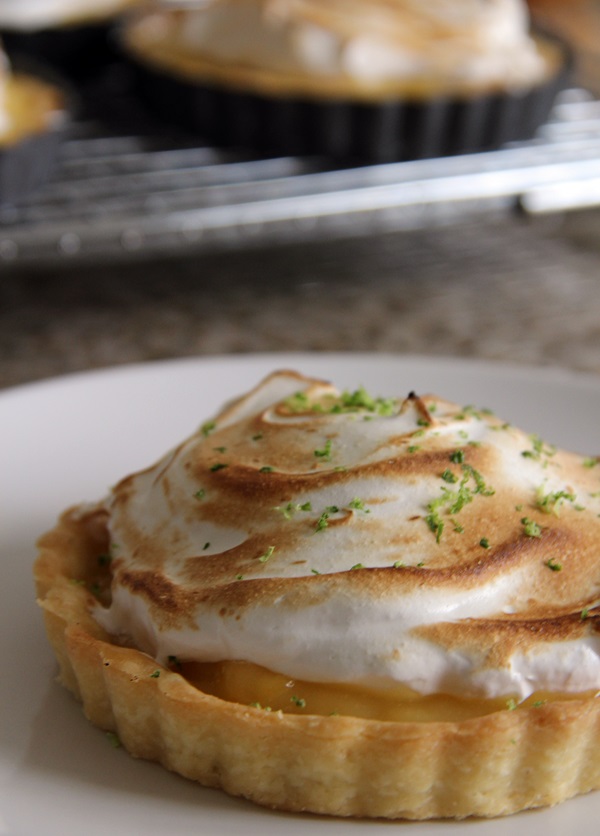
Perhaps the best part of these tartlets is the cloud of toasted meringue, which should be piled generously on top of your curd. I finished my tartlets with a quick zest of lime for an additional zing and a little bit of color. Here’s to making your own sunshine!

Grapefruit Tartlets with Meringue
Makes six 4-inch tartlets or one 9-inch tart
Ingredients
Shells:
1 1/4 c. all-purpose flour
2 Tbsp. granulated sugar
1/2 tsp. salt
10 Tbsp. frozen butter
1 egg yolk
1-2 Tbsp. ice water
Grapefruit curd:
3/4 c. fresh grapefruit juice (from about 2 medium grapefruits)
2 tsp. grapefruit zest
1/4 c. fresh orange juice (from about 1 medium orange)
1/2 c. water
2/3 c. + 2 Tbsp. granulated sugar
4 egg yolks
1/3 c. cornstarch
4 Tbsp. unsalted butter
Meringue:
4 egg whites
3/4 c. granulated sugar
1/4 tsp. vanilla extract
Optional:
lime zest, for garnish
Instructions
Shells:
In a large bowl, whisk together the flour, sugar and salt. Using a pastry cutter or two forks, quickly cut the butter into the dry mixture. After you get the big pieces incorporated, you can use your fingers to crumble it into a sand-like consistency. Be careful not to handle the mixture too much, as you want the butter to stay cold. Mix in the egg yolk with a large spoon until uniform, and then add the ice water one tablespoon at a time until the dough comes together. Form the dough into a ball, wrap it tightly in plastic wrap, and place in the refrigerator for 30 minutes.
Pre-heat the oven to 425 degrees Fahrenheit. Remove the dough from the refrigerator and place it on a well-floured surface. Lightly butter your tartlet pans/tart pan. Roll out the dough to 1/8-inch thick. Cut out rounds that are about 1 inch wider than the pan(s), using either a biscuit cutter or a paring knife. Carefully transfer each round into the pan and gently push the dough into the contours of the pan. Trim any excess dough around the top, prick the dough at the bottom of the pan several times with a fork, and transfer to the freezer for 10 minutes before baking. Re-roll the scraps to finish filling your tart pans, allowing the dough to rest in the refrigerator for a few minutes if it becomes too soft to work with.
Line each tartlet pan on top of the dough with a small square of parchment paper, or with a square of foil greased with butter on the side that touches the dough. Using pie weights or dried beans, fill each shell to prevent the dough from rising too much during baking. Bake the shells for 10-12 minutes until set. Reduce the oven temperature to 350 degrees. Remove the liner and weights from each pan and return them to the oven for an additional 12-15 minutes until golden brown. Allow them to cool completely on a rack.
Grapefruit curd:
Combine grapefruit juice, zest, orange juice, water, and 2/3 c. of sugar in a large saucepan and set aside. In a medium mixing bowl, combine the egg yolks and 2 Tbsp. of sugar. Whisk until the egg yolks are broken up and are beginning to get slightly fluffy. Whisk in the cornstarch until the mixture is perfectly smooth and pale yellow in color.
Bring the juice and sugar mixture to a boil over medium-high heat on the stove top, stirring to dissolve the sugar. Temper the eggs into the mixture by pouring about 1/4 c. of the boiling juice into the yolks while whisking VIGOROUSLY. If you do not keep the mixture moving, you will risk cooking the egg yolks! Add about another 1/2 c. of the juice into the yolks, and then return everything into the saucepan and continue whisking everything together over medium heat. After 2 minutes or so, the mixture will start to bubble and thicken. When large, thick bubbles break the surface of the curd, remove it from the heat and whisk in the butter until smooth.
Divide the warm curd between the cooled tart shells, smoothing out the tops. Allow the curd to cool and set.
Meringue:
In the bowl of a stand mixer or in a large mixing bowl, start whipping up the egg whites with an electric mixer. Beat the eggs until they are frothy and begin to hold soft peaks. Start adding the sugar slowly, starting with a few tablespoons at a time and beating thoroughly in between additions. The whites will gain more volume and eventually will hold a stiff peak. At this point, beat in the vanilla extract and turn off the mixer.
Top each cooled tart with a generous dollop of the meringue — you can either smooth out the mound or leave it spiky! Place the tarts back into the 350 degree oven for 12-15 minutes to brown the meringue, or use a kitchen torch to toast it. Garnish with lime zest if desired. Serve immediately.
Notes
If you want to make these ahead, I recommend baking and filling the tartlets with the curd and then storing them in the fridge in air-tight containers. The meringue whips up quickly and is best served just after it’s toasted!
Comments