Take a deep breath — it’s December. Isn’t it sort of lousy that a month you thought was so magical as a kid is so often a source of humongous stress as an adult? Maybe you’ve got a lot of family and friends with social events to attend. Maybe you have mountains of gifts to buy and wrap and deliver. Maybe, on top of all of this, it’s also a busy time at work and all you want to do is come home at the end of the day and drink a bottle glass of wine and pray for January to come. I feel ya.
But this year, I’m making an effort to do things differently and to be more mindful about my December. Will you find me in a festive sweater blasting Christmas carols while I wrap my gifts in Pinterest-worthy paper? Hell no. But will there be cookies in my house and in little boxes for my friends and my colleagues? You betcha. It’s cookie season, people. Look alive.

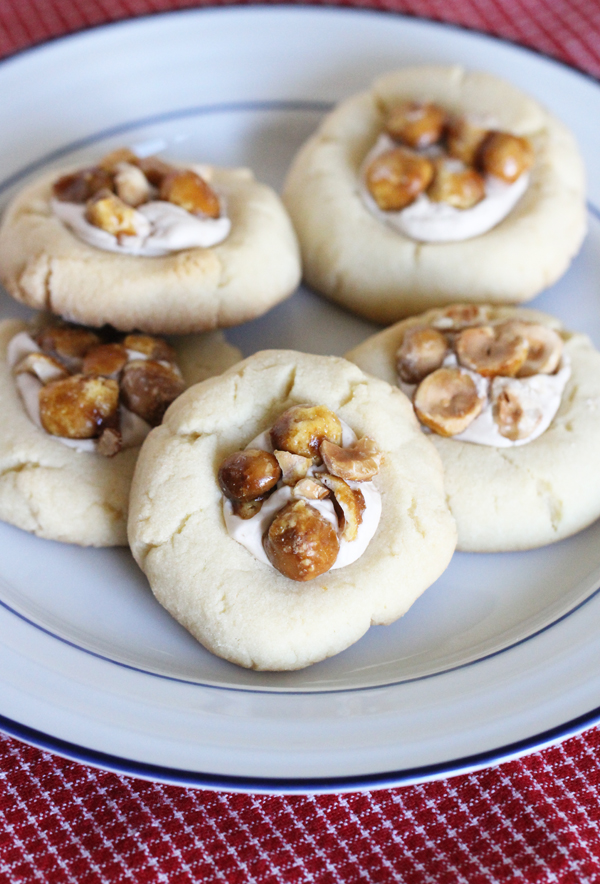
Today’s recipe is a variation on a thumbprint cookie, a simple shortbread-like cookie with an indentation normally filled with jam or chocolate. This version gets a little fancy (full disclosure: this is a weekend baking project) with a homemade Swiss meringue buttercream filling topped with amazing crunchy candied hazelnuts.
The key to these cookies is not being stingy with the buttercream. Load it on to those cookies! Make sure your thumbprint divots are deep enough to hold a healthy dollop of it! You’re going to want the creamy contrast to the candied nuts.
Here’s to a festive December!
Candied Hazelnut Thumbprint Cookies
Makes about 2 dozen

Ingredients
Candied Hazelnuts
1 c. blanched hazelnuts
1/2 c. granulated sugar
2 Tbsp. water
Cookies
2 sticks unsalted butter, at room temperature
2/3 c. granulated sugar
1 egg yolk
1 tsp. vanilla extract
2 1/4 c. all-purpose flour
1/2 tsp. salt
Buttercream
2 egg whites
1/2 c. granulated sugar
Pinch of salt
1/2 tsp. vanilla extract
1.5 sticks unsalted butter, at room temperature
2 Tbsp chestnut cream (optional)
Instructions
Candied Hazelnuts
Start with blanched hazelnuts (it will make your life SO much easier) and prep a sheet pan with a piece of parchment paper.
[Note: If your hazelnuts have skins on them, fill a small saucepan with water and add 4 Tbsp. baking soda to the water. Bring it to a boil and add your hazelnuts. Reduce the heat and simmer for about 3-4 minutes. Test a hazelnut by removing it from the pot and running it under cold water. If the skin slips off easily, drain the entire pot and slip of the skins under cold water. If not, simmer a minute longer until it’s easy to remove the skin.]
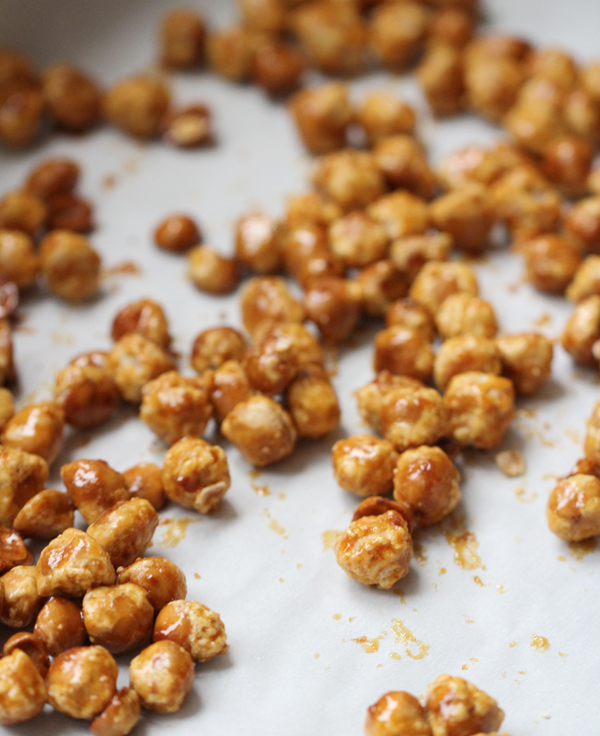
Add the sugar and water to a saucepan over medium heat and stir until combined and beginning to bubble. Add the hazelnuts to the sugar syrup and stir gently to coat. Stir frequently — after a few minutes, the sugar will crystalize on the outside of the hazelnuts — we’re not done yet! Continue cooking for another 5 minutes or so. The sugar will melt again and begin to turn a dark amber color. Keep stirring to continue coating the hazelnuts with the caramelized sugar. When the sugar is evenly melted and caramelized, pour the hazelnuts out on to your prepared baking sheet, spread in an even layer and allow to cool.
Cookies
Preheat the oven to 350 degrees Fahrenheit.
Cream together the butter and sugar with the paddle attachment in a stand mixer until very light and fluffy, at least 4 minutes (alternately, use an electric hand mixer and bowl to do this step). Add the egg yolk and vanilla and mix until combined. Add the flour and salt a little bit at a time until all ingredients are incorporated. The dough will be very dry.
Shape dough into balls by rolling it between your palms (I use about a Tablespoon for each cookie). Place each dough ball on an unlined baking sheet, leaving about an inch between cookies. Flatten the balls slightly with your fingers and then use a kitchen spoon or the back of a rounded Tablespoon to create a slight indent in the center of the cookie, being careful not to press the dough all the way down to the baking sheet.
Bake the cookies until set (they will not be brown on the top), about 12-14 minutes. Remove to a wire cooling rack.
Buttercream
Combine the egg whites, sugar and salt in the top of a double boiler (or a metal or glass bowl set on top of a pot of simmering water). Whisk constantly for about 5-8 minutes over the heat as the mixture is gently heated by the water. The mixture will become opaque white and will thicken like marshmallow as you whisk.
When the meringue is hot to the touch and fully combined (you should not be able to see sugar granules — it should all be melted together), remove from the double boiler and use either a hand mixer or a stand mixer with whisk attachment to whip the meringue at high speed until it holds stiff peaks, about 5 minutes. Add the vanilla extract and whisk to incorporate.
If using a stand mixer, switch to the paddle attachment. If using a hand mixer, turn the speed to medium-low. Add the soft butter a few Tablespoons at a time and mix until glossy and smooth. I folded in 2 Tablespoons of chestnut paste to my buttercream to pump up the nutty flavor, but you can leave yours vanilla-flavored if you prefer! Transfer the buttercream to a pastry bag fitted with a wide piping tip (you can also spoon in your buttercream and leave the pastry bag out if you prefer!).
Assembly
Cover the cooled hazelnuts with a piece of parchment, or transfer them to a zip-top plastic bag. Using a meat mallet, rolling pin or other heavy kitchen tool, crush the candied nuts coarsely — I like them almost as halves so that they maintain their crunch!
To assemble cookies, take a FULLY cooled cookie and either pipe or spoon the buttercream in the divot in the center (don’t skimp!). Press the crushed hazelnuts into the buttercream to finish.
Store cookies in the refrigerator for up to a week after baking, but serve at room temperature so that buttercream is soft!

Comments